Mapping for Dummies/Lesson2
| Mapping for Dummies |
|---|
Prelude
If you already solved Lesson 1, you will have some experience in using UFORadiant at this point. As things starting to get more complex, it will not be possible to explain every single step here.
Lesson 2: Building up the Map
Goals of this lesson
Our objective now is to take our existing map from Lesson 1, and build it up, this way introducing the most common tools in UFORadiant.
Windows
Windows are always handy things to have... especially if you'd like to shoot out of them. For now, our windows will be just holes in the wall.
For this, we start an empty copy of UFORadiant first. This is not really necessary here, but we will have to start with it at some point.
There are different ways we can choose to bring our windows in place.
Using the Clipper Tool X
The Clipper tool will cut one or more selected brushes along a given plane. This plane can be defined by placing either two or three vertices. Let us do this step by step :
- Cut (not copy) and paste the wall from the map into the other copy of UFORadiant.
- 6 to set grid 32.
- Type X to bring up the Clipper tool, click (LMB
 ) once at the top of the wall, and another time at the bottom. Two dots with #0 and #1 should come up along with a line. This will show where the cut will be done.
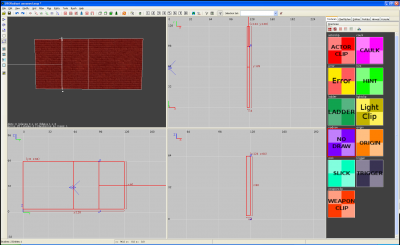
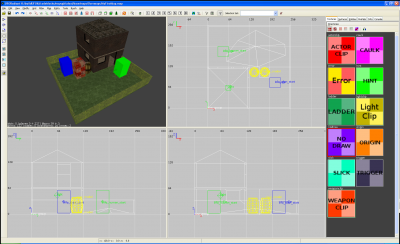
 - Hold down Shift ↵. It will split the brush along the line. We repeat this, cutting our original wall into 3 pieces. The first picture shows how to place the cuts.
- Deselect the two outer brushes, using Shift LMB
 .
. - Hit 3 to set grid 4.
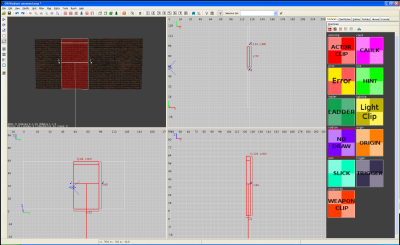
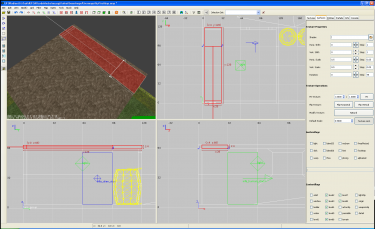
- Cut twice again, this time along the Y-axis, as shown in the second picture.
- Q to return to Resize mode.
- We could now delete the brush in the middle to create our window. But we can use it as our dummy in the next section, so lets keep it for now.
- Copy and paste the entire selection back to the primary map
Using CSG Substract Shift U
Now we use our dummy brush to create another window, this time next to the door. Again, let us do this step by step.
- Use 5 to set the grid to 16.
- Select the dummy with Shift LMB
 and use the button in the toolbar to rotate it 90 degrees around the z-axis.
 - Now we place this brush where we want the window, and hit Shift U. This will remove the area where you put the brush, and cut up the original wall into multiple pieces.
- Hit Backspace to remove the 'window making brush' when done.
There is a major drawback here. The wall pieces lost their level flags! You have to inspect them carefully and fix this problem.
Also, there are some nodraw textures now on the cut surfaces. We will have to fix this, too.
Lighting
Open Context menu and choose light to add a local light source. For now we use a high light value, like 300, so it's not lost. The light entity will be invisible to the end user, but the resulting light is not, so we can shove it into the middle of a room with no adverse affect.
The properties of light entities are managed in the Entities tab of the side bar. There is no need to set level flags on our light enity. Light entities use the same absolute ("origin") position as the info_*_start entities we handled at the end of Lesson 1.
In order to see the effect, we will have to load the map in 'night' version. It needs some practice to get a feel for the values needed, so maybe this is a good point to toy around with different settings for light value and colours.
Using models
Using models is a fast way to add good looking details to a map. To add a model, we chose 'Create model' in the Context menu. This will open the 'Model Selector' screen. These folders contain all models available, but not all of them are usefull for maps.
For our example, we choose models/objects/barrel/barrel.md2 and place it somewhere next to our shed. As it is a barrel and not a bird, its bottom should hit the ground (check in front / side view)! Also, we might want to align it to grid 32 (in the top-down view).
Properties and levelflags of models are managed in the 'Entities' tab of the sidebar. This is described here.
Models in the world of UFO AI behave different from brushes in certain ways. Let´s take a look.
1. If no levelflags set, the model will not show up at all on the map. So all levelflags are set by default.
2. The model will not cast a shadow.
3. It will not prevent an actor from stepping into it. An actor can not stand upon it.
4. Shots will go through.
So it is more kind of a ghost right now. Of course there is something we can do about this, but not now. Let´s use a prefab instead.
Using prefabs
Definition
A prefab is nothing more than a *.map file we can import into our own map. This way we don´t need to build a simple chair up from scratch each time. Also, models will have the needed common clips attached here.
Adding another barrel
Using the Prefabs tab in the sidebar we can see all available categories. We open the misc folder and select the barrel. From the picture can be seen it uses the model we already used before. Let´s place the barrel prefab next to our existing one.
Note: This might be a good time to build an alien container. Simply put a floor and 4 walls next to your map and move the info_alien_start (keep within grid 32!) there. This way you can explore your map in game without getting trouble.
A second level
We need one, as adding a stair makes no sense without it. Again, we do this step by step.
- 7 to set grid 64 (the hight of a level)
- select the roof with Shift LMB
 and drag it up in either side or front view, adjust levelflags
 - select the floor of the shed, Ctrl C followed by Ctrl V will copy/paste it
- the new floor is selected, shift him up and adjust levelflags
- do the same for the walls (as we will not need a door in level 2, you might want to replace this one)
Stairs
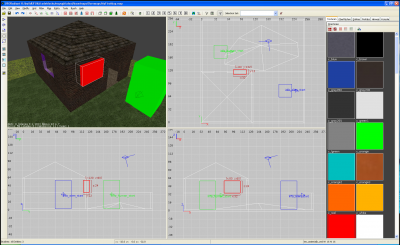
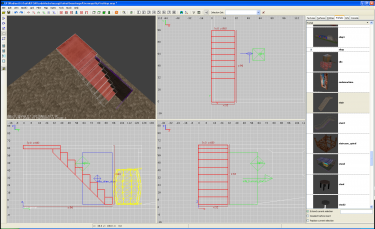
First, the floor of our second level needs a hole for the stair to fit in. I strongly recommend using the Clipper tool for this. Two pictures tell more than one word, so :
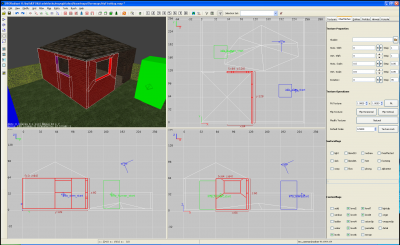
We will use the /misc/stair prefab as our stair for now. As seen in the second picture, it does not exactly fit into our hole. It is just too big. This is not by mistake, but because the wall of our shed uses some units of this cell. We simply resize the stair to fit into the hole.
This works also with more than one brush selected, but can be tricky. We have to pay attention when dragging the mouse.
More technical information about how stairs work can be found here.
Next step
It is a small map, but playable. So before doing the next step, toy around here (but keep a copy of the current file, as we will keep on working with it). Playing on the map will give you a good feeling about the dimensions, lighting and look of the textures. Try different textures and different scalings for them to find out what looks best.
Next step is found in Lesson 3.
Be warned, this is stone cold technical stuff waiting for you. But it is necessary for you to know about that, so move on.
Links
- Mapping for Dummies: Lesson 1
- Mapping for Dummies: Lesson 3
- Mapping - Tutorials and more
- Mapping/Dimensions - Explicit tutorial on Dimensions.
- Mapping/Tutorials/Levelflags - Explicit tutorial on setting Level flags.
- Mapping/Compile - Compiling .bsp file information.
- Console - Accessing the in-game console.
- UFORadiant mouse and keyboard controls
