Difference between revisions of "Modelling/3DSMax"
(No difference)
|
Latest revision as of 10:03, 23 November 2012
General
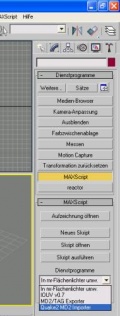
We have md2-exporter scripts for 3DSMax in our repository in src/tools. Copy the *.ms files to your 3DSMax installation folder to plugins dir.
Export tag file
Note: Tag files are only for character and weapon models at the moment.
Note: Make sure the select the Save animation checkbox for character models.
The max files in our repository have some meshes with the names tag_floor, tag_head, tag_rweapon and tag_lweapon. Hit the h-key and select these meshes (but not the tag_floor (only used for some calculations for other tags)) - then open the md2 export plugin and hit the export tag button. The tag filename should have the same base as the md2 filename. For example body01.md2 and body01.tag. We have a perl script in src/tools named md2_tag.pl - you can use it to compare your tag file with already existing ones.
These tags identify the position of the floor, the head and where the playermodel will hold it's weapons.
Import tag file
You can also import tag files. But for character tags the tag_floor is not exported, and thus is lost.
Export md2 file
A character model needs two md2s. One for the body and one for the head. Both meshes have to be aligned to the origin (0,0,0) (The body is already aligned in our max files). Then select the mesh and open the md2 export plugin.
- Plugins settings
- Save Animation: For character body models and other animated models activate this checkbox (not for the head of a character - we use tag files for this)
- Frames Step:
- Active Time Segment, Custom Time Segment, from, to:
- Skins: See Modelling/Skins
- Z-Sort triangles:
- Generate Normals:
- Unified Bounding Box:
- finally hit the export md2 button.
Useful extensions
- Texporter for exporting the UV map as a bitmap.
Character animation
See this page for more information.
Splitting mesh into levels
UFO:AI works with different levels. Meshes that are quite tall will need to be split into different parts. First of all you will need a reference. The best reference mesh is the water tower, import this to see at what height you need to cut the mesh.
Then select your imported mesh, convert to editable poly and scroll down the modifier until you see the "slice plane" button. Press this in and then move the plane that you see in the viewpoint to the place where the different levels meet. When it's in the right place press the "slice" button. After this is done you might want to press F4 to get the wireframe up, it will make the next bit easier. Convert to editable mesh and select all the faces on the top or the bottom of the mesh you have just split and detach to make a new object.
You now have your mesh split right at the correct level, some large faces may need to be filled in and textured but at this point you are more or less done. Just export the mesh into separate parts. Remember the higher levels also include the meshes for all the levels below it.
