Mapping for Dummies/Lesson3
| Mapping for Dummies |
|---|
Prelude
When writing this, I assume you came here step by step. So you should be able to compile your map, add a proper map definition to the maps.ufo and thus be able to load (and play) your map in skirmish mode.
In short, you should already have killed an alien on your own map.
If not so, you will have to go back to Lesson 2 or even Lesson 1 in order to reach this goal first.
Lesson 3: How to improve your map
Goals of this lesson
What I want to talk about in this lesson is, how to make the map 'clean', whereas 'clean' means the way we do the basic brushwork. As for now our small example map is far from perfect in the way we did this. I want to show you the tools that will help you in finding and fixing all kind of mistakes that might occur and generally introduce the idea of 'clean brushwork'.
We will reduce brushcount and facecount for our map in order to make it run fast as lightning. And we will make sure there are not such ugly things like z-fighting or missed levelflags in order to make it look good.
So lets get started.
MyFirstMap
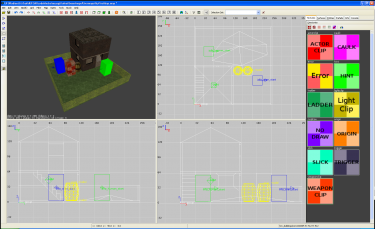
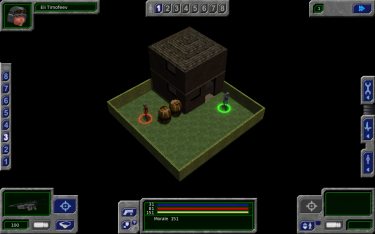
If you followed all the lessons and were successful, your "MyFirstMap" will look similar to mine now.
Using advanced parameters of ufo2map
Typing ufo2map --help into the command line will show a list of all parameters available. Some of them are more usefull than others. The following you will have to use pretty often.
Parameter -check
Using the -check parameter will make ufo2map running a check of the .map file. This is a good thing to use, as it will report a lot of mistakes that will happen. So we type ufo2map -check maps/myfirstmap into the command line and get a message about found issues. It will not do any changes to your map file.
Here is a short list of what messages you might encounter.
| message | meaning | solution |
|---|---|---|
| missing levelflags | points to a brush/entity with no levelflags | preferably manually, -fix parameter will automatically set all levelflags 1-8 here |
| set levelflags continuous | points to a brush/entity where a levelflag is missing between, e.g. level 2 and 4 have the levelflag set, level 3 has not | the -fix parameter will do this for us |
| mixed face contents | this is often the result of using the 'copy / paste face texture' feature, causing inconsistent levelflags | manually |
| z-fighting | overlapping brushes have a common face | manually |
| nodraws set | an information about the number of faces we should set to nodraw | the -fix parameter will do this for us |
| func_group with no brushes given | entity list contains an empty func_group | manually or using -fix parameter |
| Couldn´t load textures/... | texture not found, maybe wrong texture name or path | manually |
Every message will include the number of the brush/entity in question. You can use the tools/find brush feature in UFORadiant to select it for you.
Note : There are some subparameters available, but we will not deal with them here. Subparameter all is used by default.
Parameter -fix
On running ufo2map -fix maps/myfirstmap the mapcompiler will fix some common mistakes. For this, it will load the .map file in question (e.g. "/maps/myfirstmap"), change it and save the changed file, overwriting the original one.
Note : If you work on the map in UFORadiant, then save it and run -fix, afterwards you will have two different versions of the file. The original one, opened in UFORadiant, and a different one (edited by ufo2map -fix) on your hd. You will have to decide here wich version you want to work with.
Here is a short list of what messages you might encounter.
| message | meaning | solution |
|---|---|---|
| missing levelflags | points to a brush/entity with no levelflags | set all levelflags 1-8 |
| set levelflags continuous | points to a brush/entity where a levelflag is missing between, e.g. level 2 and 4 have the levelflag set, level 3 has not | set missing levelflag(s) |
| nodraws set | an information about the number of faces that were changed to nodraw | changed |
| func_group with no brushes given | entity list contains an empty func_group | will be deleted |
Every message will include the number of the brush/entity in question. You can use the tools/find brush feature in UFORadiant to select it for you.
Note : There are some subparameters available, but we will not deal with them here. Subparameter all is used by default.
Clean your map
Now we should go back to our map and clean it. Once ufo2map -check and ufo2map -fix give you back nothing (yes, nothing - there will be no fireworks) we can take the next step.
Reducing brushcount
Reducing the number of brushes will reduce the compile time, the size of the file and thus result in better performance. So we want this number as low as possible.
Do you still remember the window we made, using the CSG-substract tool? Let´s take a closer look. The way we did it split the wall into six pieces. After some small changes there are only five left.
Reducing face count
Now, one of the better practices we should have used and I hadn't bothered telling about yet was reducing face count. Every face the renderer doesn't have to draw helps reduce the compiler's and game renderer's work. So, for good performance, we want this number as low as possible for our map.
For this lesson, I will use 'face count' to determine the number of rendered faces only.
The common textures, like nodraw and actorclip, will not be rendered and therefore are not included in 'face count'. This leaves us with two ways to go when trying to reduce 'face count'.
Using nodraw texture for faces that are not visible in game
We did talk about that already. The -fix parameter of the mapcompiler does a lot of this work for us automatically, but not all. But we can do some things here, too.
- In preferences/settings/orthographic view settings we enable the option always caulk for new brushes. This way, whenever we build a new brush, there will be nodraw set for all faces. Now we only put a texture on the visible faces.
- In preferences/settings/clipper tool settings we enable clipper tools uses caulk and make sure caulk texture name is "tex_common/nodraw". Whenever we use the clipper tool now, it will automatically put nodraw textures on the cut surfaces
Reducing the number of exposed faces
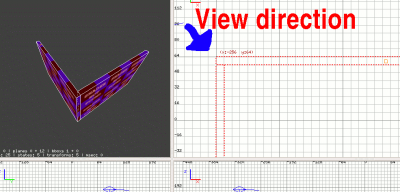
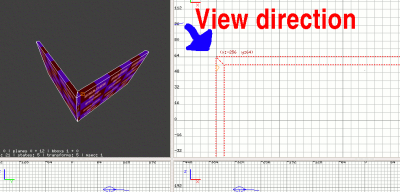
This is similar to reducing brush count. One of the easiest things we can do is cornering the edges. At each corner of our building we have an exposed, 4 grid wide space... with a little modification, we deal with this. Put your map on Grid '4' with 3, and then select your brush. Use E to select edges, and then drag the edge of the brush with the exposed edge in one grid. Deselect a few times (to get out of edge selection then brush selection), and select it's neighbor. Use edge again, and drag it out to cover the missing angle. The following two images will help you make sense of the desired result (thanks to User:Mattn for the images):
You want to do this when it makes sense and you're removing a face from exposure. Brush corners (not T's) make a prime example for this, as both the shed and the hedges can gain by this. If you're grabbing a prefab or building your own brush, unless you want someone behind it or there's a purpose to it being away from a wall, press it to the wall and remove unneeded faces on the brush.
Now it will get somewhat more complicated.
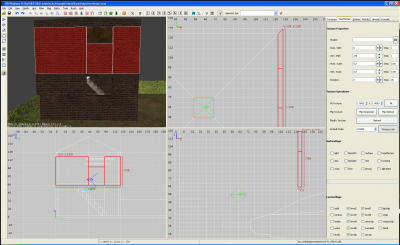
When we started out once in lesson 1, we built the walls of our house upon the ground. Later on, we continued this style, resulting in what we now see in the picture below - some faces of our level 2 floor are visible from outside of the building.
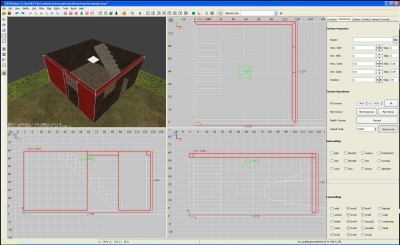
Reducing facecount here is pretty simple : Drag the floor back into the house by four units (the width of the wall), afterwards drag the wall down by four units (the height of the floor). The result will look like the second picture. The wall now covers the outside face of the floor and we can put a nodraw texture there.
Do not forget to run -check and -fix now! In case something went wrong, you should fix it immediately.
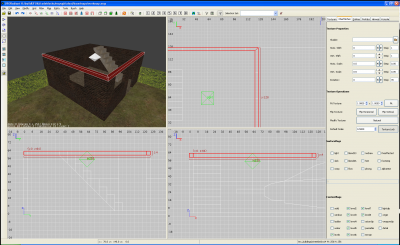
Another example, this time we take a look from above. Looking at the X/Y-view will show three faces visible on one wall, but only one visible face for the other.
Special case
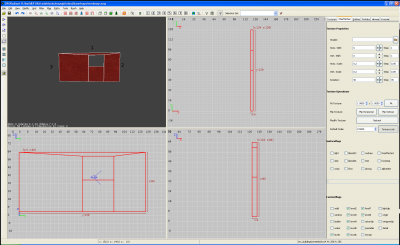
The previous examples show the most common problems. Now we go to a special one. In this example, we will have to care about the side view, too. You will not meet something like this too often. Maybe it could be the last wall standing from a ruined house.
[done] Regarding the second pic : Do we need to reduce the nodraw faces too? ShipIt 10:19, 11 February 2012 (CET)
- good point - as these are nodraws, you are right. there is no need to do this. though it be be cleaner --Mattn 13:33, 11 February 2012 (CET)
Next step
is Lesson 4.
Credits
Special thanks to mattn and H-Hour, as most of the stuff above I learned from them.
Links
- Mapping - Tutorials and more
- Mapping for Dummies / Preliminaries
- Mapping for Dummies: Basic Definitions and Controls
- UFORadiant mouse and keyboard controls
- Mapping for Dummies: Lesson 1
- Mapping for Dummies: Lesson 2
- Mapping/Dimensions - Explicit tutorial on Dimensions.
- Mapping/Tutorials/Levelflags - Explicit tutorial on setting Level flags.
- Mapping/Compile - Compiling .bsp file information.
- Console - Accessing the in-game console.
