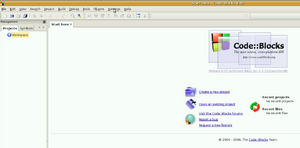
Code::Blocks
General
We have project files and a workspace (build/projects/ufo.workspace) in our repository.
- See
build/projects
Just hit Ctrl F9 to compile or Ctrl F11 to recompile all.
Please also make sure to add the MinGW\bin directory to your path variable - otherwise you won't be able to compile the po files with the included batch file.
Prepackaged version
Download our prepackaged version from: codeblocks.zip. You just have to set the Search dirs to the MinGW path. Some parts might not be needed if Code::Blocks was able to auto-detect the MinGW GCC compiler.
- extract the archive to
c:\development\. (You can put it somewhere else, then modify the paths listed below, but keep in mind to not have whitespaces in your path!) - open C::B
- If you are running Windows VISTA [or XP], you need to run this as an Administrator (right click on CodeBlocks.exe and select Run as Adminstrator).
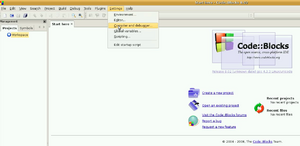
- go to Settings->Compiler and debugger
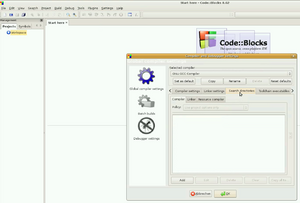
- select GNU GCC Compiler
- select Search directories tab
- add
c:\development\codeblocks\MinGW\includeto Compiler search dirs - add
c:\development\codeblocks\MinGW\include\SDLto Compiler search dirs - add
c:\development\codeblocks\MinGW\includeto Ressource search dirs - add
c:\development\codeblocks\MinGW\libto Linker search dirs - select Toolchain executables tab
- change the compilers installation directory to
c:\development\codeblocks\MinGW - go to Settings->Editor...
- in TAB options:
- Use TAB character must be set
- TAB indents must be set
- TAB size in spaces: must be 4
- copy the dynamic libraries (*.dll) from
contrib\dlls\to the UFO:AI root dir, or into a directory in your path (e.g.c:\windows\system32). Or add thecontrib\dllsdirectory to your path. - You may also need to add the
MinGW\bindirectory, and thec:\development\codeblocks\MinGW\libexec\gcc\mingw32\4.4.1directory to your path for the compiler to work. Code::Blocks will need a restart for this.
Now you are ready to open the UFO:AI workspace file and compile the game. You will find this file under \build\projects
Note: if you have a multicore processor, you can speed up compilation by setting Number of processes for parallel builds in Settings->Compiler and debugging settings->Other settings to a value higher than 1.
- (Take note here again: If you select the number of processors here to be equal to the maximum number of processors (i.e. 2 for dual core, 4 for quad core) you have, you risk running other applications at a very laggy rate, as CB will utilise maximum capabilities of every CPU power allocated.)
Now you should have a 'partially' working executable. In order to build a fully working game, you also need to
- compile the maps by executing compile_maps.bat in contrib\scripts (or use the map-get script, see Mapping/Compile for more information)
- (Advise: It might be wise to do a '/clean' parameter (aka "compile_maps.bat /clean") from the dos script from time to time, in order to rebuild all maps from scratch. This must be done especially after major works have been done to map-related functions (eg ufo2map, pathfinding).
Building a always up-to-date C::B package on your own
Once you have downloaded the prepacked version you can always generate a version on your own by. Just start the msys.bat in the codeblocks/MinGW directory. Now you must change the directory to the ufoai/trunk/contrib/scripts directory (e.g. cd /c/games/ufoai/trunk/contrib/scripts). Once you are here you can run ./codeblocks.sh. Using the create parameter here will download all the needed files from the net and build a new zip file for you. From time to time the script must be updated because some of the links disappear from the net. In this case, please let us know that there are deadlinks and will try to fix it asap.
If you install a new version, don't forget to modify the path to the new version. The settings should be the same, but a check is never wrong.


